

Gromit Amigurumi pattern is copyrighted under the Creative Commons Attribution-Noncommercial-No Derivative Works 3.0 License. This pattern is for personal use only. Feel free to make this for yourself or to give as gifts to people. However any sale, reproduction, or distribution of the pattern and or dolls created from the pattern without permission is strictly prohibited.
This post may contain affiliate links.
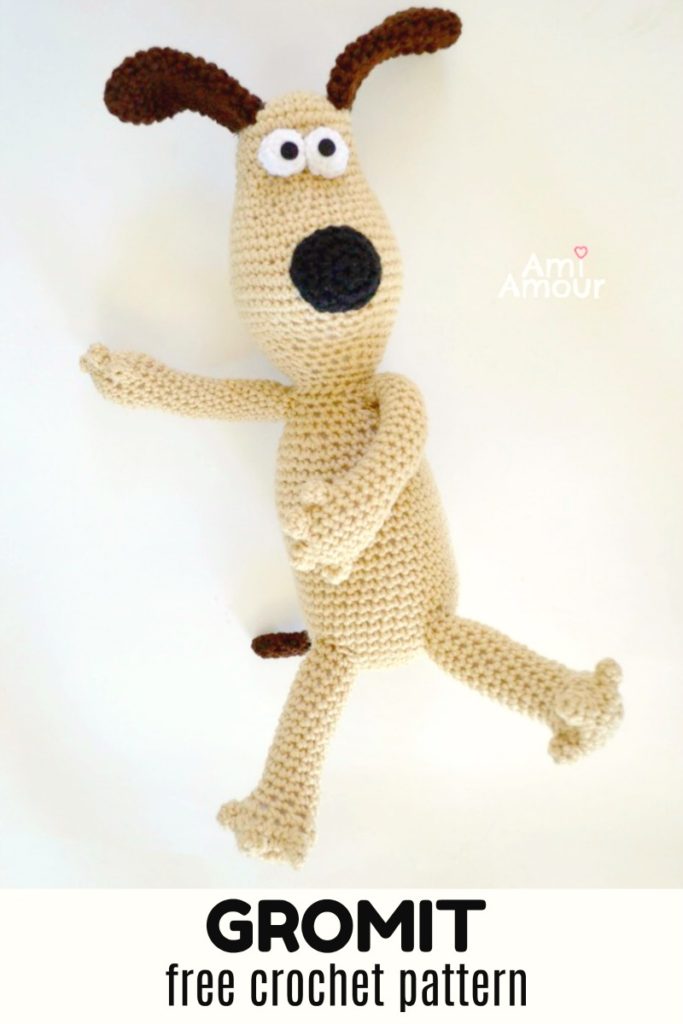
Gromit Amigurumi Pattern
SKILL LEVEL: Easy
CROCHET HOOK: Size H-8 (5 mm)
YARN:
Red Heart Super Saver
#334 Buff
#365 Coffee
#312 Black
#311 White
NOTIONS:
Polyester Fiberfill
Black and White Felt
Yarn Needle
Fabri-tac Glue
APPROXIMATE SIZE: 17 inches tall from head to toe.
NOTES: Do not join rounds. Rounds are worked continuously in a spiral. Stuff as you go. You will not stuff the ears, toes, and fingers.
TIPS:
Use a bobby pin as a stitch marker to mark your rounds!
For sc dec, use the invdec (invisible decrease) by decreasing in the front loops of the stitches

HEAD
Round 1 6 sc into adjustable ring.
Round 2 2 sc in each st around – 12 sc.
Round 3 [2 sc in next st, sc in next st] around – 18 sc.
Round 4 [2 sc in next st, sc in next 2 sts] around – 24 sc.
Round 5 [2 sc in next st, sc in next 3 sts] around – 30 sc.
Round 6 Sc in each st around.
Round 7 [Sc dec, sc in next st] 4 times, sc in next 18 sts – 26 sc.
Round 8 [Sc dec, sc in next st] 2 times, sc in next 20 sts – 24 sc.
Round 9 Sc in each st around.
Round 10 [2 sc in next st, sc in next 3 sts] around – 30 sc.
Round 11 Sc in each st around.
Round 12 [2 sc in next st, sc in next st] 4 times, sc in next 22 sts – 34 sc.
Round 13 Sc in each st around.
Round 14 [2 sc in next st, sc in next st] 6 times, sc in next 22 sts – 40 sts.
Round 15 Sc in each st around.
Round 16 sc in next 6 sts, [2 sc in next st, sc in next 2 sts] 4 times, sc in next 22 – 44 sc.
Round 17 Sc in each st around.
Round 18 Sc in next 8 sts, [2 sc in next st, sc in next st] 4 times, sc in next 28 sts
– 48 sc.
Round 19-21 Sc in each st around.
Round 22 Sc in next 8 sts, [sc dec, sc in next st] 6 times, sc in next 22 sts – 42 sc.
Round 23 Sc in each st around.
Round 24 Sc in next 4 sts, [sc dec, sc in next st] 6 times, sc in next 20 sts – 36 sc.
Round 25 [Sc dec, sc in next 4 sts] around – 30 sc.
Round 26 Sc in each st around.
Round 27 [Sc dec, sc in next 3 sts] around – 24 sc.
Round 28 [Sc dec, sc in next 2 sts] around – 18 sc.
Round 29-30 Sc in each st around.
Fasten off, leaving a long tail.
BODY
Round 1 6 sc into adjustable ring.
Round 2 2 sc in each st around – 12 sc.
Round 3 [2 sc in next st, sc in next st] around – 18 sc.
Round 4 [2 sc in next st, sc in next 2 sts] around – 24 sc.
Round 5 [2 sc in next st, sc in next 3 sts] around – 30 sc.
Round 6 [2 sc in next st, sc in next 4 sts] around – 36 sc.
Round 7 [2 sc in next st, sc in next 8 sts] around – 40 sc.
Round 8-21 Sc in each st around.
Round 22 [Sc dec, sc in next 8 sts] around – 36 sc.
Round 23-26 Sc in each st around.
Round 27 [Sc dec, sc in next 4 sts] around – 30 sc.
Round 28 Sc in each st around.
Round 29 [Sc dec, sc in next 3 sts] around – 24 sc.
Round 30 [Sc dec, sc in next 2 sts] around – 18 sc.
Round 31 Sc in each st around. Fasten off.
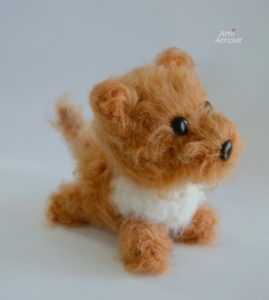
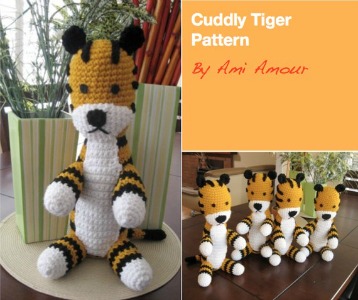
Other Free Patterns You May Like:
1. Brushed Dog Tutorial / 2. Tiger Amigurumi Pattern
ARM (Make 2)
Round 1 6 sc into adjustable ring. 
Round 2 2 sc in each st around
– 12 sc.
Round 3 Sc in each st around.
Round 4 [2 sc in next st, sc in next 5 sts] around
– 14 sc.
Round 5-6 Sc in each st around.
Round 7 [Sc dec, sc in next 5 sts] around – 12 sc.
Round 8 [Sc dec, sc in next 4 sts] around – 10 sc.
Round 9-23 Sc in each st around.
Fasten off, leaving a long tail.
LEG (Make 2)
Round 1 6 sc into adjustable ring. 
Round 2 2 sc in each st around.
– 12 sc.
Round 3 [2 sc in next st, sc in next st] around
– 18 sc.
Round 4 [2 sc in next st, sc in next 2 sts] around
– 24 sc.
Round 5 [Sc dec, sc in next st] 6 times, sc in next
6 sts – 18 sc.
Round 6 Sc dec (6 times), sc in next 6 sts – 12 sc.
Round 7-20 Sc in each st around.
Fasten off, leaving a long tail
FINGERS and TOES (Make 14)
Note: Sew 4 fingers for the arm, and 3 toes for the leg. See photos above.
Round 1 6 sc into adjustable ring.
Round 2 Sc in each st around.
Fasten off, leaving a tail.
EAR (Make 2)
Note: Do not stuff Ear! It is to remain flat.
With brown yarn.
Round 1 6 sc into adjustable ring.
Round 2 2 sc in each st around – 12 sc.
Round 3 [2 sc in next st, sc in next 5 sts] around – 14 sc.
Round 4-6 Sc in each st around.
Round 7 [Sc dec, sc in next 5 sts] around – 12 sc.
Round 8-14 Sc in each st around.
Fasten off, leaving a long tail.
NOSE
With Black yarn.
Round 1 6 sc into adjustable ring.
Round 2 2 sc in each st around – 12 sc.
Round 3 [2 sc in next st, sc in next st] around – 18 sc.
Round 4-5 Sc in each st around.
Fasten off, leaving a long tail.
TAIL
With brown yarn.
Round 1 5 sc into adjustable ring.
Round 2-15 Sc in each st around.
Fasten off, leaving a long tail.
EYEBALL (Make 2)
With White yarn.
Round 1 5 sc into adjustable ring.
Round 2 2 sc in each st around – 10 sc.
Round 3 Sc in each st around.
Round 4 Sc2tog around – 5 sc.
Fasten off, leaving a long tail.
ASSEMBLY
Stuff all the parts with polyfill, except for the EARS, FINGERS, and TOES.
Sew HEAD onto BODY.
Sew EARS onto HEAD
Sew NOSE onto HEAD.
Sew ARMS onto the section where the HEAD and BODY meet up.
Sew LEGS onto BODY. For placement, set Gromit’s BODY upright on a flat surface, and sew LEGS to the bottom so it looks like Gromit is sitting down with his legs out.
Sew TAIL on the bottom back of the BODY.
Sew EYEBALLS to the groove section in HEAD.
To create the EYE PUPILS, cut out 2 circles from black felt. Use Fabri-tac and glue onto Eyeballs.
CONGRATULATIONS! You have just created your very own Gromit!
Don’t forget to share your project with me on Instagram or Facebook!


18 Comments
Jessica
December 15, 2010 at 2:41 amThis is awesome…Now you need to put up a Wallace, Yes?
Also, any ideas for a JiJi cat from the Studio Ghibli film, Kiki’s Delivery Service?
Pic at this site:
http://www.google.com/imgres?imgurl=http://www.hanamiweb.com/jiji.jpg&imgrefurl=http://www.hanamiweb.com/kiki.html&usg=__9bkEODS_G-GInw5DxwLMRrZMOLs=&h=199&w=144&sz=6&hl=en&start=0&sig2=zO1E7nAIE1PlhqltOHm3-g&zoom=1&tbnid=KPOhoVACT4CX0M:&tbnh=137&tbnw=96&ei=vSoITY73MYqUnwfb7uRh&prev=/images%3Fq%3DJiJi%2Bfrom%2BKiki%2527s%2BDelivery%2BService%26um%3D1%26hl%3Den%26client%3Dfirefox-a%26sa%3DN%26rls%3Dorg.mozilla:en-US:official%26biw%3D1680%26bih%3D891%26tbs%3Disch:1&um=1&itbs=1&iact=hc&vpx=145&vpy=104&dur=636&hovh=158&hovw=115&tx=47&ty=73&oei=jSoITYP4JMP48Aa0uv0N&esq=4&page=1&ndsp=45&ved=1t:429,r:0,s:0
Wow, long, sorry bout that.
Ami Amour
January 11, 2011 at 10:38 pmSurprisingly a lot of people ask about a Wallace pattern too. I guess Gromit needs his partner-in-crime. It’d be a hoot making all his teeth. I’m a big fan of cats and Jiji is especially so cute. I know there’s a great pattern out there already though!
TheYankeeGirl
August 27, 2013 at 3:37 amI actually just started making a Wallace pattern, and I think it’s going to work! Once I complete it this week, I’ll post it on my site and Ravelry.
Also, thank you for posting this Gromit. It completely inspired me!
Megan
December 11, 2012 at 10:52 pmCute pattern! I had to comment that your kitty looks exactly like my cat, Gus!!
dj
November 8, 2011 at 6:20 pmmy family are wallace and gromit fans. do you have a gromit pattern ?
Ami Amour
November 8, 2011 at 10:14 pmHi DJ, the Gromit pattern is available within this entry. I hope you enjoy!
Linda
January 2, 2012 at 2:23 pmhi sharon …. loving the pattern thus far, but can you clarify the erratta ?
the arms count is wrong …. line 2 will only increase this round by 3, thus stitch count will not be 12 etc.
did you mean to ‘ 2sc in each stitch’ …. this will give the correct count ?
thanks
Lin.
ps….. we really gotta have wallace … any progress there ? (will be happy to pay for wallace pattern !)
Isabella
May 20, 2012 at 1:20 amHi, I am currently making this Gromit for myslef but im a beginnner and im stuck. On round 16 do I repeat what is in the brackets or the 6 sticthes as well 4 times?
Thanks
Patrones y otros enlaces de amigurumi « La principiante
December 31, 2012 at 1:31 am[…] Gromit de la serie Wallace&Gromit: Patrón de AMI AMOUR […]
Cj
June 21, 2013 at 12:50 amI love Wallace & Grommit . . . Thanks for the pattern!
Silvina
August 21, 2013 at 2:38 pmWonderfull! My kids will love this, thanks for sharing… 🙂
Greetings from Buenos Aires
purrdee
August 26, 2013 at 10:12 pmFab!!
Are the terms you use US or english please…
Agree need a Wallace ohh and the dog tooooo.
clare
February 27, 2014 at 8:39 pmIs there a Wallace pattern yet?? 😀
Patrón amigurumi Gromit.
September 29, 2014 at 11:32 am[…] patrón original es de Ami Amour, a quien le agradecemos que haya permitido está […]
A Surprise, A Sleepover and A Separation | vuchickens
October 21, 2014 at 7:37 pm[…] got the free pattern here: https://amiamour.com/2010/05/gromit-amigurumi-pattern/ but I followed this Ravelry project notes to make the spherical eyes and longer nose and […]
Patrón amigurumi Gromit. | Hasta el Monyo
February 8, 2015 at 4:28 pm[…] patrón original es de Ami Amour, a quien le agradecemos que haya permitido está […]
20 Free Patterns for Crochet Dogs • Oombawka Design Crochet
October 30, 2015 at 4:12 am[…] 18. Gromit Amigurumi by Ami Amour […]
Hobbes Doll Amigurumi- Tiger Crochet Pattern - Ami Amour
September 25, 2018 at 6:24 am[…] be sure to tag me on my Instagram or Facebook. If you liked this pattern, you may also like my Gromit Amigurumi Pattern. Be sure to subscribe by email so you won’t miss any of my […]