
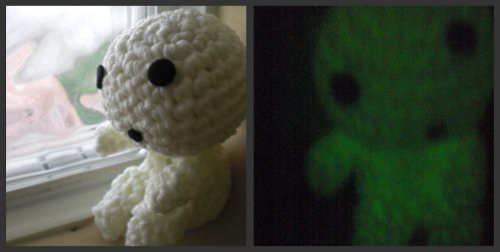
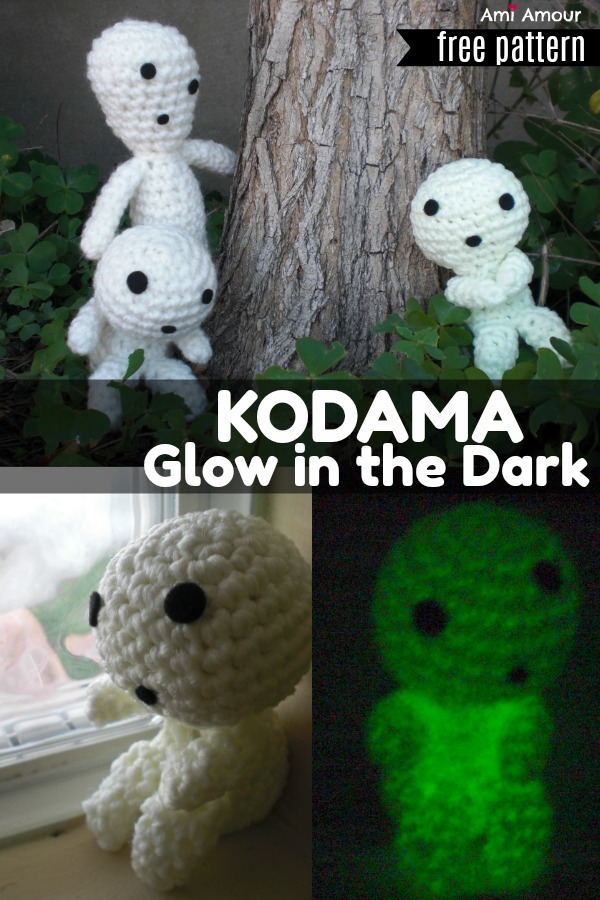
One day I discovered something special and unexpected. I found out that Glow-in-the-dark yarn existed! I thought it would be really fun to experiment with the yarn, and so I really racked my head to find something special to make from it.
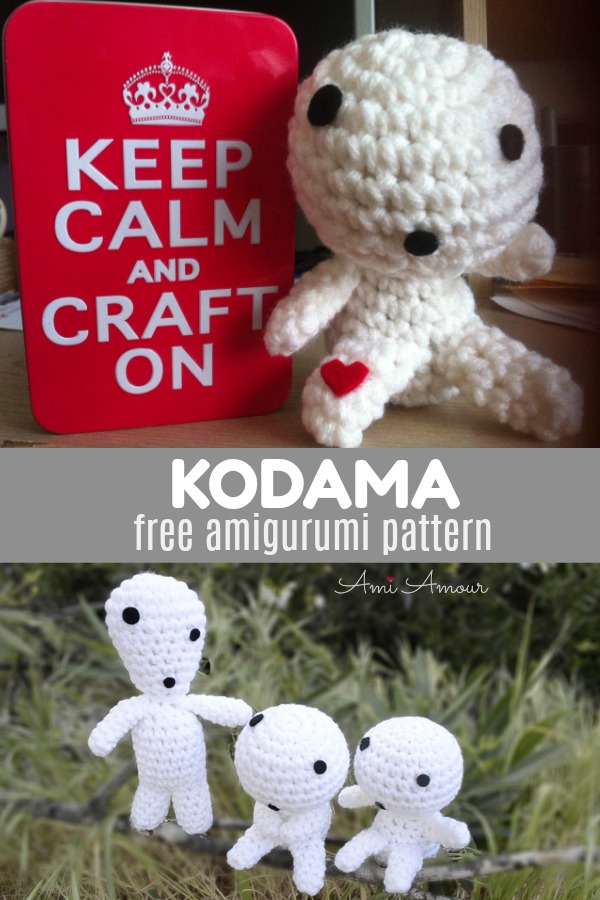
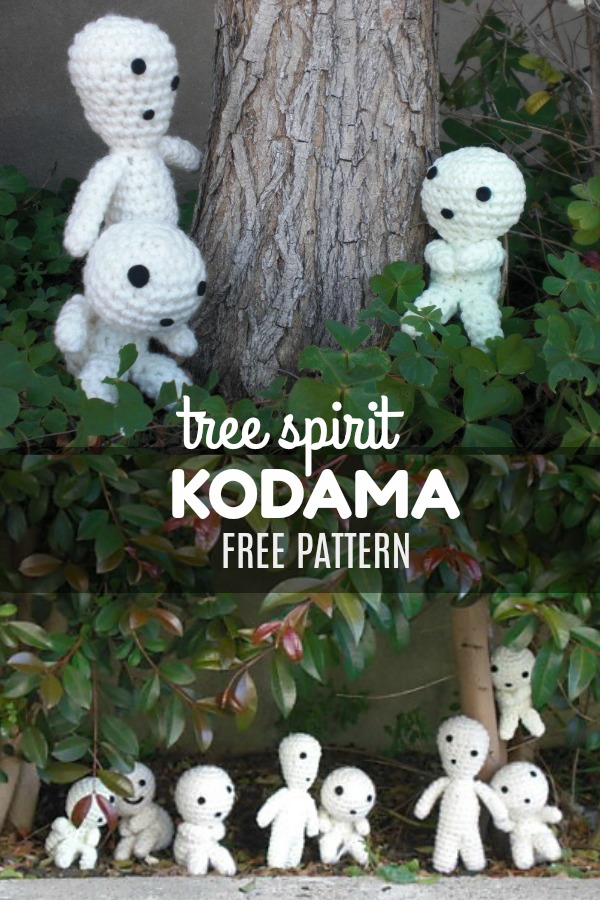
I am a huge fan of Hayao Miyazaki. In Princess Mononoke, the Kodamas (tree spirits) appear looking ghostly yet cute at the same time. They tilt their heads around and pop it back into place making these rattling noises. The more I thought about it, the more excited I became about what I thought would be the perfect combo of the ami and the yarn.
I went into my studio and I began making 2 different versions of the Kodamas: a sitting one, and a standing one.
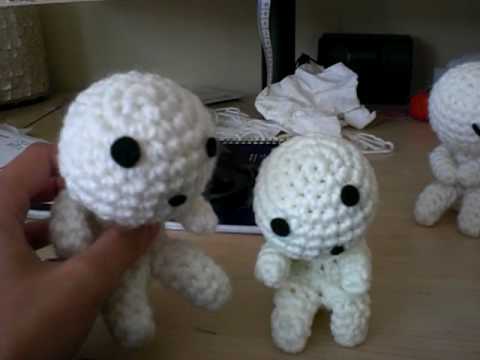
The sitting one has a more round face and looks like its sitting with its knees up. The standing Kodama has a head more like an alien. The great thing about these Kodomas is that if you make the faces different, they look like different versions, so feel free to experiment with the faces!
If you don’t have Glow-in-the-dark yarn, you can still make them using any sort of yarn and it will still turn out quite spooky cute!
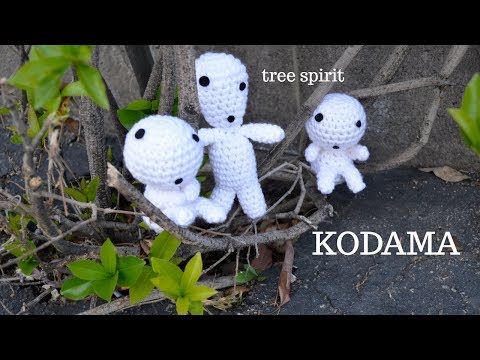
Check out the video here to see the Glow in the Dark Kodama in action:
I also have a Video Amigurumi Tutorial, showing how to crochet the Kodama from beginning to end:
Kodama Amigurumi Tutorial Video
*Disclosure: This post contains affiliate links. This means I may receive a small commission if you decide to purchase anything by clicking on one of these links. Thanks for your support!
Glow in the Dark Kodama Pattern is copyrighted under the Creative Commons Attribution-Noncommercial-No Derivative Works 3.0 License. This pattern is for personal use only.
Kodama #1 – Sitting Kodama
SKILL LEVEL: Easy
CROCHET HOOK:
Size H (5 mm)
Size G (4 mm)
YARN:
Glow in the Dark Yarn
NOTIONS:
Black Felt
Yarn Needle
Stitch Marker
Fabri-Tac Glue
HEAD & BODY
Round 1: 6 sc into adjustable ring.
Round 2: 2 sc in each st around – 12 sc.
Round 3: [2 sc in next st, sc in next st] around – 18 sc.
Round 4: [2 sc in next st, sc in next 2 sts] around – 24 sc.
Round 5-8: Sc in each st around.
Round 9: [Sc dec, sc in next 2 sts] around – 18 sc.
Round 10: [Sc dec, sc in next st] around – 12 sc.
Round 11: [Sc dec, sc in next st] around – 8 sc.
Round 12: Sc in each st around.
Round 13: [2 sc in next st, sc in next st] around – 12 sc.
Round 14: [2 sc in next st, sc in next 3 st] around – 15 sc.
Round 15: Sc in each st around.
Round 16: [2 sc in next st, sc in next 4 st] around – 18 sc.
Round 17-18: Sc in each st around.
Round 19: [Sc dec, sc in next st] around – 12 sc.
Round 20: Sc dec around – 6 sc.
Fasten off, leaving a long tail.
Stuff and sew closed
LEG (make 2)
Round 1: 6 sc into adjustable ring.
Round 2-4: Sc in each st around.
Round 5: Hdc in next 4 sts, sc in next 2 sts – 6 sts.
Round 6: Sc in each st around.
Fasten off, leaving a tail.
ARM (make 2)
Note: Switch to smaller size hook – Size G (4 mm)
Round 1: 5 sc into adjustable ring.
Round 2-6: Sc in each st around.
Round 7: Sc dec in next st, sl st to fasten off – 4 sts.
Do not stuff.
ASSEMBLY
1. Stuff the HEAD and BODY.
2. Stuff the LEGS loosely. Do not stuff the ARMS.
3. Sew HEAD onto BODY. Sew LEGS into the Body 3 rows down from the top of the body. It should look as if its knees are bent and it is sitting down. Sew arms onto the side by lining it up to look like a vertical line at the side. You can sew the both hands together so they look like they’re touching or the arms can be free. See photos below.
4. Cut 3 circles of various size from black felt for the eyes and mouth. Glue the eyes and mouth on with Fabri-tac Glue. You can also embroider French knots instead.

Hands Free

Hands Together
________________________________
Kodama #2 – Standing Kodama
The standing Kodma might be a little more trickier to make because you need to join 2 different body parts by using sc. I will try and get a tutorial up on it soon.
HEAD
Round 1: 6 sc into adjustable ring.
Round 2: 2 sc in each st around – 12 sc.
Round 3: [2 sc in next st, sc in next st] around – 18 sc.
Round 4: [2 sc in next st, sc in next 2 sts] around – 24 sc
Round 5: Sc in each st around.
Round 6: [Sc dec, sc in next 2 sts] around – 18 sc.
Round 7: Sc in each st around.
Round 8: [Sc dec, sc in next 4 sts] around – 15 sc.
Round 9-10: Sc in each st around.
Round 11: [Sc dec, sc in next 3 sts] around – 12 sc.
Round 12: [Sc dec, sc in next st] around – 8 sc.
Fasten off, leaving a long tail.
LEGS and BODY
Round 1: 4 sc into adjustable ring.
Round 2: 2 sc in each st around – 8 sc.
Round 3-7: Sc in each st around.
Fasten off.
You have created LEG A. Repeat Rounds 1-7 to create LEG B, but do not fasten off. Join LEGS A and B by joining across 2 sts of both LEG A and LEG B with sc. (Another option: You may create the 2 legs first and then sew them together across 2 sts) You should now have 12 sts around when the legs are combined. We will now work on the body.
Round 8: [2 sc in the next st, sc in next 3 sts] around – 15 sc.
Round 9-14: Sc in each st around.
Round 15: [Sc dec, sc in next 3 sts] around – 12 sc.
Round 16: [Sc dec, sc in next st] around – 8 sc.
Fasten off.
ARMS (make 2
Note: Switch to smaller size hook – Size G (4 mm)
Round 1: 6 sc into adjustable ring.
Round 2-6: Sc in each st around.
Round 7: [Sc dec, sc in next st] around – 4 sc.
Fasten off, leaving a tail. Do not stuff.
ASSEMBLY
1. Stuff everything except for the ARMS.
2. Sew HEAD onto BODY. Sew ARMS onto Body near neck.
3. Cut 3 circles of various size from black felt for the eyes and mouth. You can also embroider French knots instead.
4. Glue eyes and mouth on with Fabri-tac glue. Glue the eyes lopsided (not symmetrical) to give it that Kodama look!
If you enjoyed this Kodama pattern, please check out my larger Kodama Amigurumi Pattern.

")
Kodama - Tree Spirits
37 Comments
Glow in the dark yarn! « Hazelbot Crochet
December 12, 2010 at 7:59 am[…] is also a review of another brand and pattern for glow in the dark Kodama over at Ami […]
chassy
January 18, 2011 at 1:23 amso for the kodama’s body and head, we use the H hook??
Ami Amour
January 18, 2011 at 1:41 amYes, that is correct.
chassy
January 27, 2011 at 4:22 amthanks!:) i wasnt sure at first but now thanks a bunch!!:) i looove ur other amigurumis too! *squeals* maybe you should sell them at another animecon youre going to:D
Ami Amour
January 27, 2011 at 4:31 amThanks! I will be at Anime LA this year with my amigurumis ^^ It’ll be my fourth year!
chassy
January 29, 2011 at 11:08 pmwow 🙂 you know im asian too:) well, vietnamese but i wanted to go to another animecon to sell my amis but they wouldnt tell me how to register for me to get my own panel at one. sooo i gave up. but i do hope to see more of ur creations:) i wanted to buy a pattern for one of your amis but im not allowed to use my parents credit card on here:/
Fellow Amigurumi Maker :3
March 5, 2011 at 10:08 pmVery nice! 🙂 I love Princess mononoke, and amigurumi’s, therefore why not put them together! 🙂 I have one question though, do you make the head with the H hook, and the rest of the body with the G hook?
Ami Amour
March 14, 2011 at 12:44 amI make everything with the H hook and the legs and arms are made with the G hook. I do this because when the rounds have small amount of stitches, I find it easier to use a smaller hook.
Leah
March 12, 2011 at 6:51 amCould you knit this also?
Ami Amour
March 14, 2011 at 12:49 amUnfortunately I’m not a very good knitter and have no idea how to create knit patterns, so I can’t help you there. I’d just look up chick knitting patterns online or you should learn to crochet, it’s fun! And Eggy is a perfect basic crochet pattern to start off with =D
wynibear
March 20, 2011 at 8:03 pmHi Sharon!
So I did what you said and picked up the needle again… The sitting kodama was my first project back into crochet and it came out surprisingly well! :o) I’ll send you a picture through e-mail when I get a chance. Thanks for the inspiration and once again, it was a pleasure meeting you at PMX 2010!
Blessings,
Winnie – the staffer whose brother bought her the gray Totoro hat 😉
Ami Amour
March 20, 2011 at 8:33 pmWyni, it’s so good to hear from you! Yes, do send me the photo. I’d love to see it. I was thinking of starting a fan gallery for projects made from my patterns too. Glad you picked the needlearts back up again. Amigurumis are especially addicting because they’re fast and fun.
Kelli
February 14, 2012 at 9:19 amPleasing to find smoeone who can think like that
Molly Kiely
June 6, 2011 at 3:58 pmAdorable — thank you for posting. I think I might skip the glow-in-dark yarn though and put rattles inside… ; )
Hollie
June 14, 2011 at 4:53 pmHi! I saw your video and loved your creations. I’m much of a knitter and know some crochet, but its so cut that I’m working on knitting it. I see the glow-in-the-dark one in your video. I like when there hands are together. thank u for showing these on youtube! they’re cute and creative. I also like when there eyes are closed, too. How do u make the eyes and mouth? Thanks! 😀
Hollie
June 14, 2011 at 5:02 pmnevermind… i see how to do the eyes and mouth. How do u french knot?
Ami Amour
July 9, 2011 at 12:04 amI don’t usually do a french know. I just like to use felt and glue it on. There’s many ways to do the eyes. Hope you figured it out!
Mary Rose
August 6, 2011 at 9:58 pmhi, thanks so much for sharing the pattern. can you also share the pattern for no face? heheh… i’m a big fan of miyazaki too..especially his film My Neighbor Totoro.. i love your pictures
Yyesha
November 4, 2011 at 10:46 pmHi,
I just started crocheting and was wondering about the abbreviations. I know what sc is but wat is dec? Please let me know so ’cause I really want to try crocheting a kodama as my first project.
Thanks,
Yyesha
(^_^)v
Ami Amour
November 4, 2011 at 10:49 pmHi Yyesha, dec means decrease. Another way that people say it is sc2tog (single crochet 2 together). I think there’s lots of tutorials online for a sc dec (single crochet decrease) so I hope that helps out! Best of luck to you!
Yyesha
November 8, 2011 at 6:47 amYeah!! I did it! Sharon, I added a mow-hawk on my kodama, I want to send you a picture of my in progress mow-hawk kodama. Where should I send it? Email me if you can. (^_^)v
Valia
January 12, 2012 at 3:01 pmI can’t even begin to explain to you how excited i was when i found out your videos on YouTube!
A lovely good-looking amigurumi, and it’s a Kodama, and it’s glowing in the dark!
Seriously, when i find the right yarn, i’m gonna knit all day long until i get a whole forest of Kodama….
Thanks again for sharing,
a dream comes true thanks to you!
Michal
February 12, 2012 at 7:58 amHi,
thanks for your nice explanation on how to make crochet kodamas –> you saved my life as my 4 year old daughter wanted to have some and I learned here how to make them 🙂 now I’m my daughter’s hero hehe
Thanks a lot again
Michal
Byakko
June 12, 2012 at 10:54 amThank you very much, I love Miyazaki’s amigurumi *-*
Lynn
July 11, 2012 at 6:34 pmI just finished my first amigurumi ever (the mushroom) and wanted to try to make the kodama too. But I don’t know what hdc means.
Ami Amour
July 11, 2012 at 6:38 pmHi Lynn, congrats on your first amigurumi! I’d love to see how it came out. Hdc means half double crochet. What you do is yarn over, go into the stitch, pull out, you should have 3 loops on your hook, yarn over, and pull through all 3 stitches. Look up half double crochet tutorial on youtube and you’ll be able to see it better. Hope that helps!
Princess-Rufflebutt
December 20, 2012 at 7:38 pmIs it okay if I make a few of these to sell among my own patterns at an anime convention? I know a lot of people would just go ahead and do it, but I wanted to get your permission if possible because I have a really bad, nagging, conscience. XD If it’s not okay, there’s no hard feelings. I have plenty of other things that are my own creations to sell.
The Vault: Part 2 | ReveDreams.com
November 24, 2013 at 4:00 pm[…] implied I did right away in one of my very first blog posts here, I ambitiously set out to stitch a kodama for my brother-in-law. This was in my second month of crocheting, and it went rather […]
Lily
January 23, 2014 at 11:12 amHello !
I really like your little Kodama !
Could you tell me the size of the yarn ? (
Thank you 🙂
kalima40
June 7, 2014 at 11:30 pmMe encantan los kodamas!!! Son geniales!!! Gracias por el patrón para hacerlos!! ^_^ Aunque soy algo torpe… podrías hacer un video tutorial para confeccionarlos?
Glow in the dark yarn, Kodama, and WIP. | The Dragon's Cave
October 2, 2014 at 11:40 pm[…] it. I’ve been looking for Glow in the Dark yarn for a while, ever since I saw a pattern for Kodama (Okay, maybe I didn’t look THAT hard for Glow in the Dark yarn… but you know, I do look […]
JOAN BRACKEN
August 5, 2015 at 2:54 amSo cute. My daughter in law wants me to make her these. Thank you for the pattern, but where do I get the glow in dark yarn. None of my hobby or yarn stores carry it. Thanks again……….
Ami Amour
August 5, 2015 at 3:49 amHi Joan, unfortunately I think most places are out of stock on this glow in the dark yarn, but you might find an occasional skein for sale on ebay. You can try using these vinyl glow in the dark yarn from JellyYarns.com: http://www.jellyyarns.com/yarns.shtml#glow instead, but the yarn is stiff so it’s pretty brutal on the hands. I’ve made one from it and quite liked how it came out though. It’s a lot more stiffer and harder than yarn, so the completed object feels a bit more like a sculpture or vinyl toy rather than a plush. If you get a chance to finish the amigurumi though, I’d love to see it!
Soot Sprite Amigurumi Pattern - Ami Amour
June 3, 2018 at 11:02 pm[…] to making your little helpers! And if you’re a fan of Studio Ghibli, be sure to check out my Kodama pattern as well. Happy […]
Adam
March 21, 2020 at 3:42 pmWhat yarn are you using for the non glow and the dark sprite? I like it it looks really nice and thick. Do you have a link to amazon or joanns?
Ami Amour
March 21, 2020 at 3:52 pmI like to use the Red Heart Super Saver for the worsted weight, acrylic yarn, and also for Soot Sprites, I’ll use the Lion Brand Fun Fur. You should be able to find my Amazon affiliate link under the supplies section on my Soot Sprite page I believe!